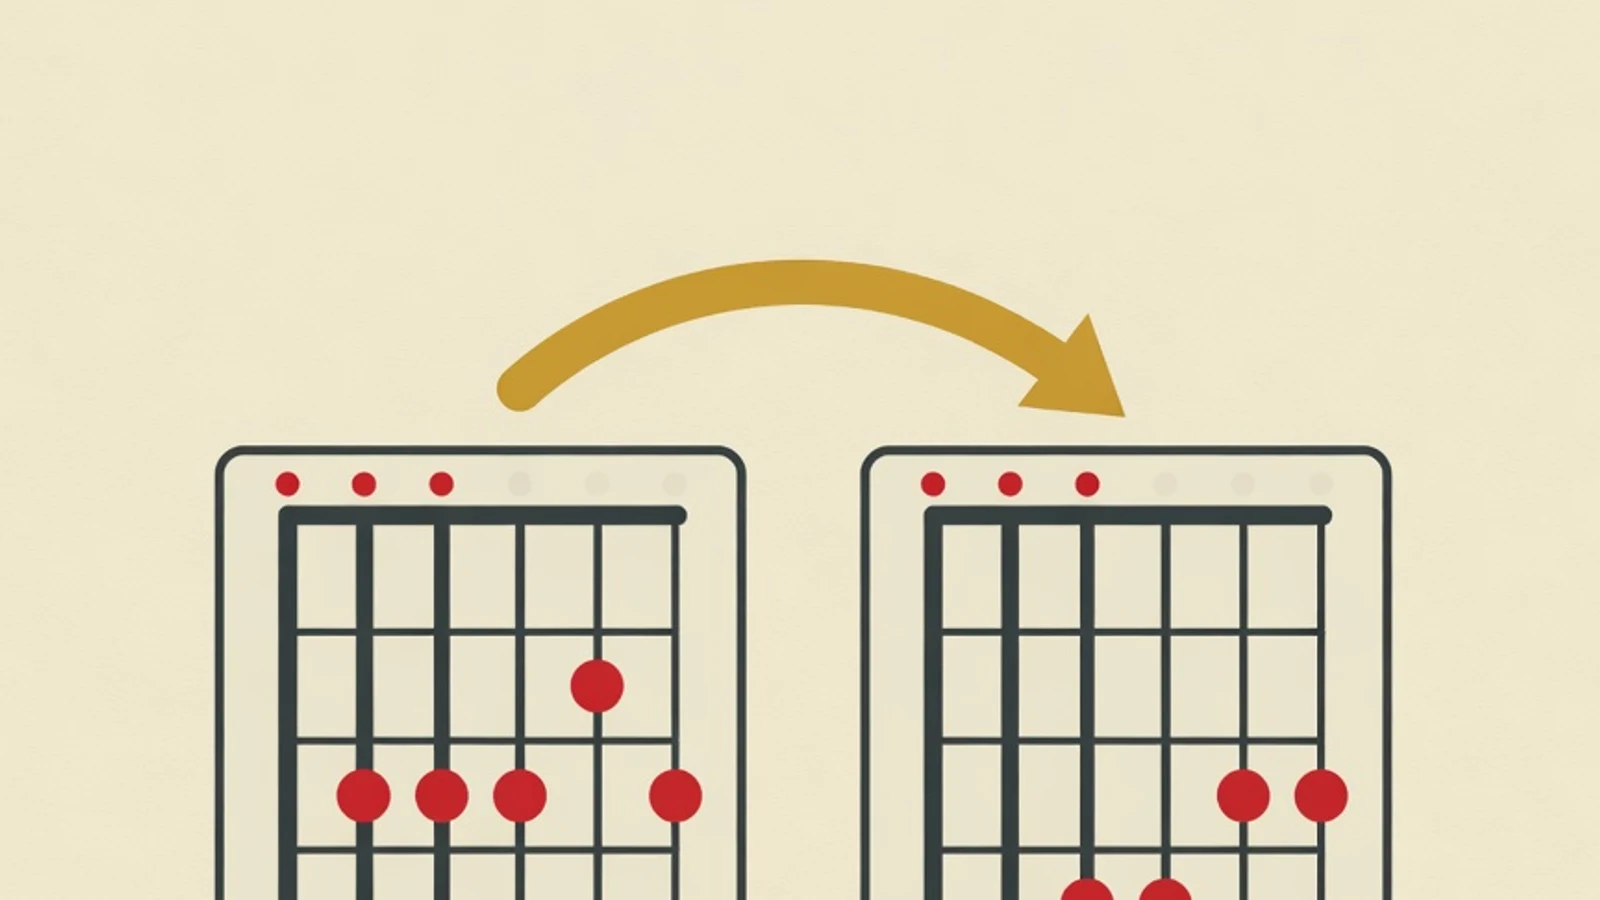
Reading guitar chords starts with understanding the chord diagram: vertical lines are the strings, horizontal lines are the frets, and dots show where each finger presses. Once you read diagrams fluently, switching guitar chords smoothly is built through anchor fingers that stay planted and economical hand motion that keeps movement short.
- A chord diagram is read like a guitar standing up facing you: thick string on the left, thin string on the right
- An anchor finger that stays planted speeds up transitions between neighbouring chords
- Drill one chord pair with a one-minute count before adding a new pair
- A chord diagram or chord chart for the song you are learning
- A guitar tuned with a tuner so every chord sounds correct
- A small notebook to log your daily chord-change counts
Key Numbers for Reading and Switching Guitar Chords
Understanding the guitar chord diagram from scratch
A guitar chord diagram, often called a chord box, is a small map that tells you which finger presses which string. Picture the guitar standing upright and facing you. Six vertical lines represent the strings, from left to right: thick E, A, D, G, B, then thin E. The top horizontal line is the nut, and the lines below it are the first fret, second fret, and so on. The black dots inside the box show where the fingers press, and the number under or inside each dot shows which finger to use. Left-hand finger numbering is standard: 1 index, 2 middle, 3 ring, 4 little finger. The symbols above the nut line matter too. An O means the string is played open without being pressed, while an X means that string is not sounded. When you read a song chord chart, the chord name sits above the lyric on the exact syllable where the chord changes. Reading where these change points fall trains your eyes to read ahead before your hand moves, a habit that helps enormously once the song tempo picks up.
Symbols on a Chord Diagram and What They Mean
Vertical and horizontal lines
Six vertical lines are the strings, horizontal lines are the frets. The thick top line marks the nut, the end of the neck near the headstock.
Dots and finger numbers
Dots are where fingers press. Numbers 1 to 4 show the index, middle, ring, and little finger to use.
O and X marks
O means the string is played open, X means the string is not sounded. Both sit above the nut line.
Fret number at the side
When a chord is played far from the nut, a small number beside the diagram shows which fret the box starts on.
Curved line or bracket
A curved line marks a barre, where one finger presses several strings at once on the same fret.
Chord name on top
A letter such as G, C, or Am above the box is the chord name. A capital letter means major, an added m means minor.
Why chord transitions keep stalling
Many beginners have already memorised the shape of several chords, yet the song still stutters every time a chord changes. The root cause is rarely the memorised shape. It usually lies in how the hand moves: all four fingers are lifted fully then placed back one at a time, leaving a silent gap that breaks the beat. An efficient hand moves as little as possible. When two chords share a finger on the same string, that finger stays planted as an anchor while the others move. When no finger is shared, the motion is still organised so all four fingers land together, like a single complete shape dropped at once. The other factor is timing. Your eyes and brain need to read the next chord early, then the hand gets a cue to release and move a fraction of a beat before the new chord must sound. A beginner who waits until the old chord finishes before moving will always be late. This is why chord transitions are trained separately from strumming a full song.
6 Steps to Read and Switch Guitar Chords Smoothly
These six steps separate the two skills, reading diagrams and switching chords, then bring them together. Finish each step until it feels comfortable before moving to the next.
- 1
Read the chord diagram and translate it to the fretboard
Take one chord diagram, say C major. Identify each element in order: which lines are strings, which dots are pressed, which finger number, then the O and X marks above the nut. After that, translate it to the guitar in your hands. Place your fingers as shown, then pluck the strings one by one from top to bottom. Skip strings marked X, and let strings marked O ring open. If a string buzzes, check whether the finger is pressing too lightly or touching a neighbouring string. Practising this translation from diagram to fretboard is what lets you play a new chord just from reading its picture, without waiting for someone to demonstrate it.
Tips- Say each element out loud as you read: D string, second fret, middle finger, so it sticks in memory
- Start with open chords that use many O strings such as Em, C, and G before touching barre chords
Do not ignore the X mark. Sounding a string that should be muted makes the chord sound murky even when your fingers are correct. - 2
Map the anchor finger between two chords
Pick a pair of chords that often follow each other, such as C to Am. Compare both diagrams side by side and find the finger that presses the same string and fret in both chords. On C and Am, the index and middle fingers share similar positions, so they can stay planted or shift only slightly. That shared finger becomes the anchor. When you switch, keep the anchor finger in place and move only the fingers that need to change. This trims the motion and keeps the hand from losing its bearings on the fretboard. Trace the other chord pairs you play often and mark each anchor finger before drilling for speed.
Tips- Note in your log: chord pair, anchor finger, and the fingers that move, so practice has a clear focus
- When there is no anchor finger, find a finger that slides along the same string without lifting fully
- 3
Drill economical motion with all fingers landing together
For chord pairs without an anchor finger, the key is to form the next chord in the air then drop it all at once. Hold the first chord, then lift all four fingers just a few millimetres above the strings while already forming the shape of the second chord. When the cue to switch arrives, drop all four fingers together into the new position. Practise this motion without strumming at first: just place the first chord, jump to the second, then back, repeatedly and slowly. The goal is for the finger muscles to remember the whole shape, so the hand no longer places fingers one by one, which is what creates the silent gap.
Tips- Practise with your eyes closed occasionally so the hand remembers the distance between positions without always watching the fretboard
- Keep fingers hovering close to the strings, the higher they lift the longer it takes to return
Avoid placing fingers one at a time in sequence. This habit feels safe early on, but it becomes a speed bottleneck that is hard to erase later. - 4
Count chord changes in one minute
A counted drill turns a vague transition into a measurable number. Pick one chord pair, set a one-minute timer, then count how many times you can switch back and forth cleanly. Clean means both chords ring fully without buzzing, with fingers pressing accurately, so slapping fingers down fast does not count. Note the number, then repeat the same pair the next day and compare. A number that climbs day by day gives real evidence of progress and keeps you motivated. Focus on clean sound first, and speed will follow on its own as your fingers learn the shapes.
Tips- Drill one chord pair per session until the number stabilises, then add a new pair
- Do not chase a high number at the cost of clean sound, a buzzing chord does not count
- 5
Connect the transition to the beat with a metronome
A clean switch when slow does not guarantee it lands on the beat when the song runs. The metronome ties the transition to a fixed time. Set a slow tempo, strum the first chord for four beats, use the fourth beat to release and move, then strum the second chord right on the next beat one. The important part is the preparation beat: the fingers start moving before the new chord must sound, leaving a fraction of a beat to make the change. If it still stalls, reduce to two beats per chord or lower the tempo. Raise the tempo only after the transition lands on the beat with no silent gap.
Tips- Count out loud one-two-three-move so the hand knows when to start releasing
- Keep the right-hand swing flowing even while the left hand is moving
- 6
Apply it to a full song chord chart
Pick a simple song whose chord chart uses two to four chords whose transitions you have already drilled. Read the chart from the start, mark where each chord changes, and notice whether any transition is reused. Break the song into small chunks per line, play the transitions in each line slowly with the metronome, then join the lines together. Reading the chart while playing trains your eyes to move one step ahead of your hand, the skill that lets you accompany a new song from its chart alone. Once one song flows, pick another with a different chord progression to widen your range of transitions.
Tips- Start with a song whose chord progression repeats so the same transition gets trained many times
- Pencil-mark the hardest chord change in the chart, then drill that part separately
Chord Diagram vs Tablature vs Chord Chart
| Format | What it shows | Best for |
|---|---|---|
| Chord diagram | Finger positions of one chord on the fretboard | Learning shapes and pressing new chords |
| Song chord chart | Chord names above the lyrics per syllable | Accompanying songs and drilling transitions |
| Tablature (tab) | String and fret of each note in order | Playing melody, riffs, and fingerstyle |
Beginners who want to accompany songs are best served by mastering chord diagrams then reading chord charts. Tablature follows once they start playing melodies.
“Beginners who freeze when changing chords usually have not forgotten the shape, they lift all their fingers then replace them one by one. Once an anchor finger is used and all four fingers are trained to land together, the silent gap between chords shrinks on its own.”
Reading and Switching Chords Practice Checklist
- Tune the guitar and reread two new chord diagrams, about 3 minutes
- Map the anchor finger on the chord pair you are training today, about 3 minutes
- One-minute drill for one chord pair, log the number, about 5 minutes
- Connect the transition to the metronome beat at a slow tempo, about 5 minutes
- Read one line of a song chord chart and play its transitions, about 4 minutes
- A chord diagram is read like a guitar standing up facing you: six vertical lines are the strings, horizontal lines are the frets, dots are finger positions, O is an open string, X is a muted string.
- Chord transitions stall because fingers are lifted then placed one by one, even when the chord shape is already memorised.
- An anchor finger that stays planted and all four fingers landing together trim the silent gap between chords.
- A one-minute drill per chord pair with a measured count, then connected to the metronome beat, builds smooth transitions in two to four weeks.