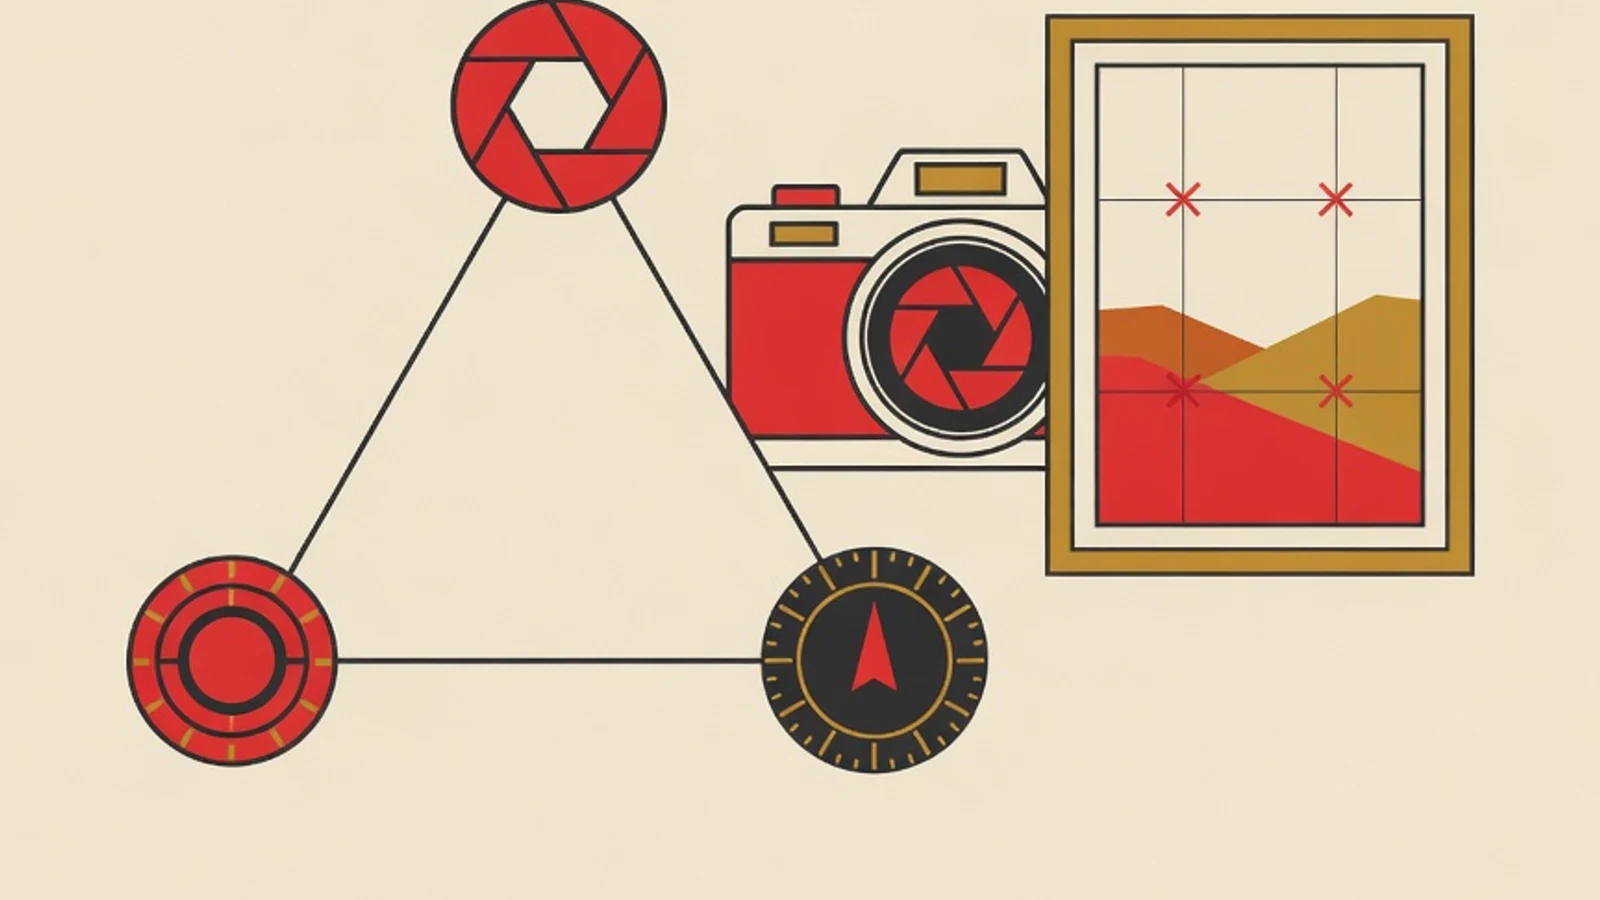
How to learn photography from scratch starts with understanding the exposure triangle, the three settings of aperture, shutter speed, and ISO that together control how bright a photo turns out. Once exposure is under control, practice composition such as the rule of thirds so the subject sits neatly within the frame. These two foundations let beginners shoot with intent instead of pressing the button and hoping.
- Master how aperture, shutter speed, and ISO work before rushing to buy expensive lenses
- Read the histogram to judge exposure objectively instead of guessing from the screen
- Practice rule of thirds and leading lines so the viewer's eye is guided to the main subject
- A camera with manual mode: a mirrorless, a DSLR, or a phone camera with a pro-mode app all work
- One versatile lens, such as an 18-55mm kit lens, is enough for every basic exercise
- An empty memory card and a fully charged battery so practice sessions run without interruption
- Regular shooting time of 20 to 40 minutes several times a week, both indoors and outdoors
Basic Numbers in the Exposure Triangle
Why the exposure triangle is the base language of every photographer
Every photo is essentially a record of the light that falls on the camera sensor for a moment. The three valves that control how much of that light enters are aperture, shutter speed, and ISO. All three are linked, so changing one setting calls for adjusting the others to keep the brightness balanced. This three-way relationship is what people call the exposure triangle. Aperture controls how wide the lens opens. A wide opening such as f/1.8 lets in a lot of light and softens the background into a gentle blur, ideal for portraits. A narrow opening such as f/11 lets in little light and keeps the whole scene sharp, ideal for landscapes. Shutter speed sets how long the shutter stays open. A high speed such as 1/1000 of a second freezes motion, while a slow speed such as 1/30 of a second gives a sense of movement and risks blur if the hands shake. ISO raises or lowers the sensor's sensitivity to light. A low ISO such as 100 produces clean photos in bright conditions. A high ISO such as 3200 helps you shoot in dark places at the cost of fine speckles known as noise. Beginners who understand the role of each valve can make deliberate choices: blur a background, freeze a running child, or shoot in a dim room without panic.
7 Steps for How to Learn Photography from Scratch
These seven steps follow the order commonly used when teaching beginners: get to know the camera, master each corner of the exposure triangle one at a time, combine them in manual mode, then sharpen your eye for composition. Finish each step until it feels comfortable before moving on.
- 1
Get to know the main camera buttons and turn on the grid
Before touching complex settings, spend time getting to know the camera in your hands. Find the mode dial, the shutter button, and how to switch between automatic mode, priority modes, and manual mode. Turn on the grid guide in the display menu so the screen is divided into nine boxes. This grid will help greatly when you practice composition later. Also switch on the histogram display if the camera offers one. Take a few photos in automatic mode first just to get used to holding the camera steady, elbows tucked to the body, and breath held for a moment as you press the button.
Tips- Hold the camera with both hands, the left palm supporting the lens from below
- Read only the button section of the manual; there is no need to memorize every feature at once
- 2
Understand aperture by practicing background blur
Turn the camera to aperture priority mode, usually labeled A or Av. In this mode you set only the f number, while the camera calculates shutter speed automatically. Place a small object on a table, then shoot the same object at f/1.8 or the smallest number available, repeat at f/8, and once more at f/16. Compare the three. At small f numbers, the background behind the object looks softly blurred and the object stands out. At large f numbers, the background sharpens too and the detail across the whole field reads clearly. This simple exercise builds the intuition of when to pick a wide opening to separate a subject from its background, and when to narrow it so everything looks clear.
Tips- A small f number means a wide opening, the part that often confuses beginners
- For face portraits, start from f/2.8 to f/4 so the eyes stay sharp
A very wide opening makes the zone in focus thin, so the nose is sharp while the ear is already blurred. Watch the focus point carefully. - 3
Feel shutter speed by shooting motion
Move to shutter priority mode, labeled S or Tv, where you set the shutter speed and the camera handles the rest. Ask someone to walk or wave your own hand in front of the camera. Shoot at 1/1000 of a second, then at 1/60, then 1/15. At high speeds, motion freezes crisply. At slow speeds, motion leaves a blurred trail that can look artistic or simply distracting. This exercise teaches when to freeze a moment, such as a child jumping, and when to slow the shutter on purpose to capture a sense of movement, such as a waterfall flowing smoothly.
Tips- A safe rule for shooting without a tripod: shutter speed at least equal to the focal length, for example 1/50 for a 50mm lens
- Rest the camera against a pole or table when you must use a slow speed
- 4
Control ISO according to how bright the room is
ISO is the third valve that lifts brightness when light is scarce. Outdoors in bright conditions, keep ISO at a low number such as 100 or 200 so photos stay clean. When shooting inside the house in the late afternoon or in a dimly lit room, raise ISO to 800, 1600, up to 3200 so photos are neither dark nor blurry. Compare the results on a computer or large screen. You will see fine speckles begin to appear at high ISO. Understand that a slightly noisy but sharp photo is more useful than a clean but dark or shaky one. Learn your camera's comfortable ISO limit through direct trials.
Tips- Raise ISO only after aperture and shutter speed have reached their safe limits
- Noise-reduction software can tidy up a little speckling during editing
ISO pushed too far fades colors and loses detail. Raise it just enough, and do not jump straight to the maximum. - 5
Combine all three in manual mode while reading the histogram
Once each valve feels familiar, turn to manual mode labeled M. Here you set aperture, shutter speed, and ISO all at once. Start by fixing the aperture for the depth of field you want, then set shutter speed for motion, and finally adjust ISO so the brightness is right. Instead of guessing from a screen whose appearance shifts with ambient light, read the histogram. This graph maps the spread from dark on the left to bright on the right. A peak piled at the far left signals an underexposed photo, while one piled at the far right signals blown highlights. Aim for a spread that stays within bounds without clipping at either end.
Tips- Change one setting first, observe its effect, then touch the next setting
- The light meter indicator in the viewfinder helps show whether the exposure is under or over
- 6
Arrange the frame with rule of thirds and leading lines
Correct exposure makes the brightness right, while composition makes the photo pleasant to view. Use the grid you turned on earlier. The rule of thirds suggests placing the main subject at one of the four intersection points of the lines, moving it away from the habitual dead center. For scenery, place the horizon on the upper third or the lower third, depending on whether you want to feature the sky or the land. Also look for leading lines, natural lines such as roads, fences, or rivers that guide the viewer's eye toward the subject. Practice shooting the same subject from several angles and frame positions, then compare which draws the most attention.
Tips- Leave empty space in the direction the subject faces so the photo does not feel cramped
- Step one or two paces closer to the subject; composition often improves simply by getting closer
- 7
Record settings, review, and repeat every session
Progress in photography grows from the habit of reviewing. After each practice session, open the photos on a larger screen and pair them with the settings you jotted down. Ask yourself: is the exposure right according to the histogram, is the main subject sharp, does the composition guide the eye well. Mark one thing to improve in the next session, such as keeping the shutter speed higher to avoid shake, or placing the subject on a third point. Short, regular practice paired with honest review turns the exposure triangle and composition into a reflex whenever you raise the camera.
Tips- Keep your favorite photos and failed ones side by side to see the pattern of improvement
- Pick one weekly theme, such as window light, to keep practice focused
The Role of the Three Corners of the Exposure Triangle
| Setting | Controls | Side effect |
|---|---|---|
| Aperture (f number) | Width of the lens opening and depth of focus | A wide opening thins the sharp zone |
| Shutter speed | How long the shutter is open and the sense of motion | A slow speed risks blur |
| ISO | Sensor sensitivity to light | A high number brings out speckled noise |
The three settings are linked. Adding light through one setting often calls for reducing another so the brightness stays balanced.
Common Beginner Mistakes and How to Fix Them
Shaky photos in a dark room
The shutter speed is too slow when light is scarce. Raise ISO or open the aperture wider so the shutter can be faster.
The subject is always centered
The habit of placing the subject dead center makes photos feel flat. Shift it to a third point using the grid.
A busy background steals attention
Objects behind the subject stand out too much. Open the aperture to blur them or change angle for a cleaner background.
Photos too bright or too dark
Judging exposure only from a screen affected by ambient light. Build the habit of reading the histogram as your reference.
“Beginners who conquer the exposure triangle first shoot calmly because they know exactly what each turn of the dial does, while composition turns a correctly exposed photo into one that holds the viewer's gaze.”
Checklist Before Pressing the Button
- Is the aperture set for the depth of focus I want
- Is the shutter speed fast enough to counter shake or subject motion
- Is the ISO right for the room's brightness without excess noise
- Is the main subject on a third point and the background clean
Bringing exposure and composition into a shooting habit
The exposure triangle and composition work like two hands that complete each other. Exposure ensures the photo's light is right, neither burned in the highlights nor drowned in the shadows. Composition arranges the frame so the viewer's eye lands straight on the subject you intend. Beginners who chase settings alone often produce photos that are correctly bright yet feel bland. Beginners who only fuss over the frame are often disappointed because their photos come out blurry or dark. Practice that unites both builds a reflex. When you raise the camera, your eyes automatically judge the ambient light to set the three settings, while also searching for a third point and a leading line to place the subject. This habit does not appear in a day. It grows from short, regular sessions, notes on settings, and honest review of your own photos. Guidance from a teacher speeds the process because small mistakes can be pointed out and corrected before they harden into habits that are hard to change.
- The exposure triangle unites aperture, shutter speed, and ISO to deliberately control how bright a photo is
- A small f number opens the lens wide and blurs the background, a fast shutter freezes motion, high ISO brightens dark rooms at the risk of noise
- The histogram gives an objective exposure reference compared with guessing from the camera screen
- Rule-of-thirds composition and leading lines steer the viewer's eye to the main subject
- Short, regular practice paired with honest review of your own photos turns theory into a shooting reflex