Learning 2D animation from scratch starts with the principles of motion first, and software follows as a tool. Train timing and spacing first through the bouncing ball, then add squash and stretch, arcs, anticipation, and follow-through. Once motion feels alive, pick one free program, build a simple walk cycle, and gather your drills into a showreel.
- Principles of motion are trained first, and software follows as a tool
- The bouncing ball is the first drill that teaches timing, spacing, and squash and stretch at once
- Pencil2D, Krita, and OpenToonz are free and enough to learn all the way to a walk cycle
- A computer or laptop able to run lightweight animation software, plus a mouse or an affordable pen tablet for drawing frames
- One free 2D animation program (Pencil2D, Krita, or OpenToonz) as your first practice space
- A notebook or reference folder to record real motion: a ball dropping, a person stepping, a flag in the wind
- A fixed practice schedule of roughly 5 to 8 hours spread evenly across the week
Starting Benchmarks for 2D Animation
What Are the Principles of Motion and Why They Are the Foundation
The principles of motion are a set of rules that make a still drawing read as natural movement to the eye. Frank Thomas and Ollie Johnston distilled them into twelve principles in the book The Illusion of Life. For beginners, three matter most: timing, spacing, and arcs. Timing sets how many frames fill a movement, which decides whether it reads fast or slow. Spacing sets the distance between drawing positions, which decides acceleration and deceleration. Arcs keep motion on a natural curve, because almost nothing alive moves in a stiff straight line. A beginner who understands these three will make pleasing motion even with simple stick figures. Expensive software will not cover for movement whose timing is wrong.
Six Stages to Learn 2D Animation from Scratch
Follow them in order. Each stage trains one group of motion principles and leaves behind a short drill that later fills your showreel.
- Step 1
Stage 1: Set Up Your Tools and Pick One 2D Program
Begin with one free program and stay loyal to it for several months. Pencil2D suits beginners because it looks simple and invites you to draw frames one at a time. Krita adds an animation timeline inside a full drawing app. OpenToonz brings onion skin and tweening close to a production workflow. Learn three core buttons first: adding a new frame, turning on onion skin (a ghost of the previous frame so you know your last position), and playing back. Set the project frame rate to 24 fps so you get used to the film standard from the start. Use a mouse if you do not have a pen tablet yet, because motion practice asks for an understanding of timing more than for smooth lines.
Tips- Keep practice projects in one tidy folder so you can compare progress week to week
- Do not switch software every week, or your time drains into learning buttons all over again
Waiting until you own an expensive pen tablet often becomes an excuse never to start. A mouse is enough for every drill in this guide. - Step 2
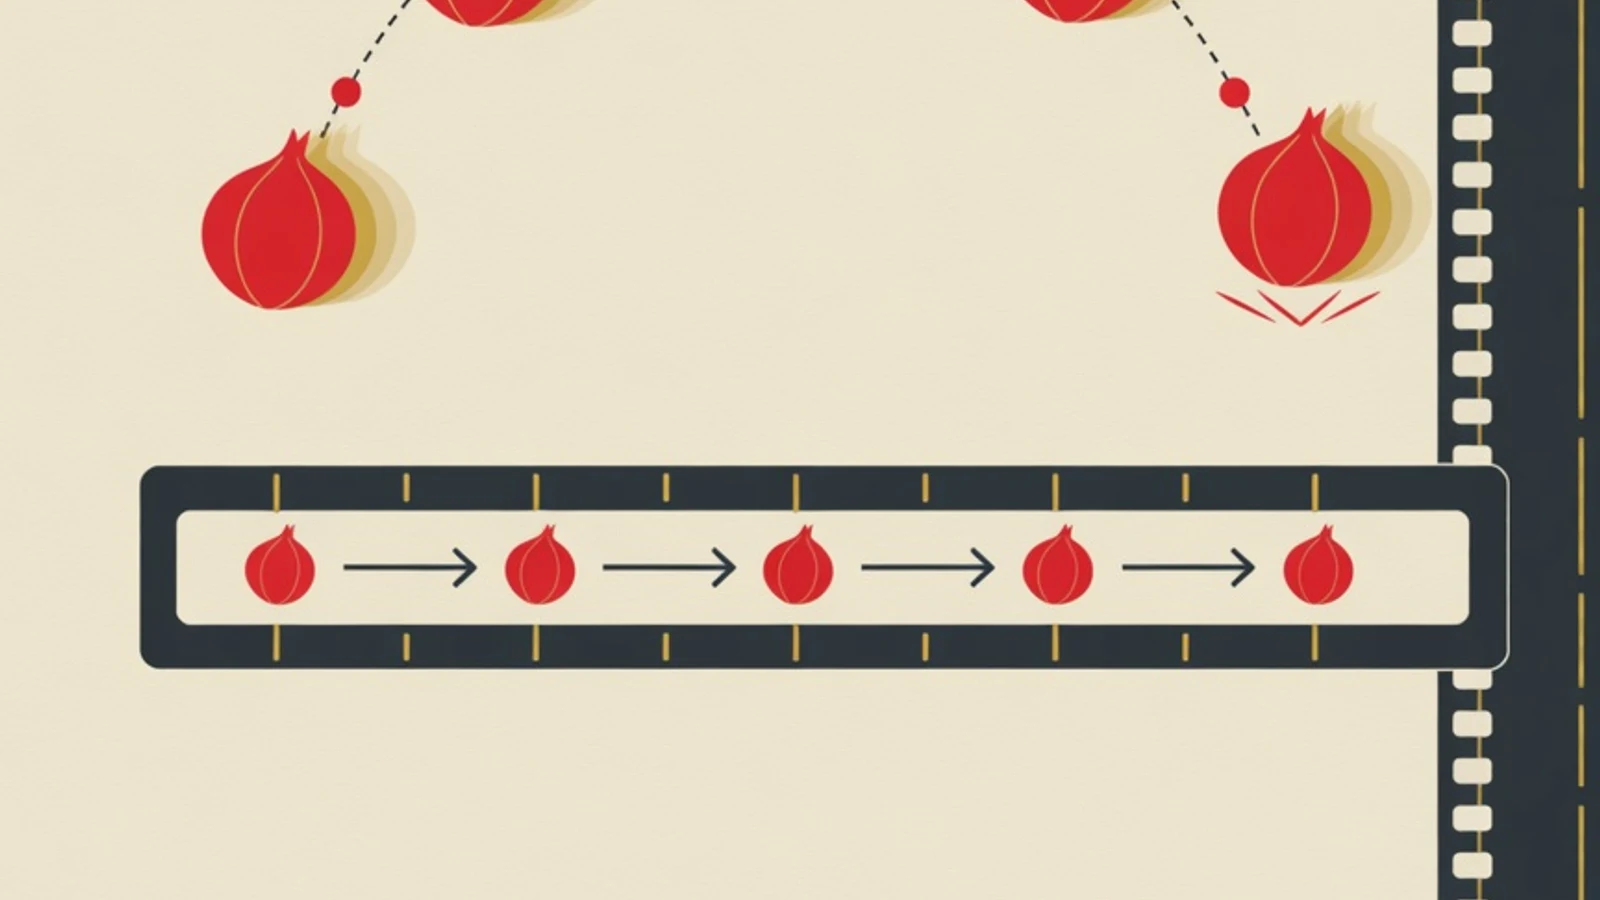
Stage 2: The Bouncing Ball for Timing, Spacing, and Squash and Stretch
The bouncing ball is the first drill every animator must master. Draw a ball that falls, meets the floor, then bounces lower and lower until it stops. This short drill trains three principles at once. Timing shows as the ball speeds up while falling and slows down at the top of its arc. Spacing shows as the gaps between drawings tighten near the top and widen near the floor. Squash and stretch appears as the ball slightly flattens on impact and elongates as it shoots up, which gives it weight and elasticity. Do a rubber-ball version that bounces high, then a bowling-ball version that is heavy and barely bounces. The difference between them trains your timing instinct more than any theory.
Tips- Keep the ball's volume the same when it squashes and stretches, so it does not look oddly inflated
- Replay often and fix the one frame that feels off before redrawing everything
- Step 3
Stage 3: Understand Arcs and Slow In Slow Out
Once the ball feels alive, train motion that follows a curve. Almost all natural movement travels a curved path: a swinging arm, a head turning, a pendulum. Draw a pendulum or a ball on a string swinging left to right, and make sure each frame's position forms a smooth, connected arc across the swing. This stage also brings in slow in and slow out, where drawings bunch up at the start and end of a move and spread out in the middle. The effect makes motion start slowly, speed up in the middle, then slow before it stops, just like real objects that cannot snap to full speed or halt instantly. Practice a waving arm and a nodding head against this arc and slow-in-slow-out guide.
Tips- Mark the arc path with a thin guide line first, then place your drawings along it
- Recheck the gaps between drawings at the ends of a move so the deceleration reads smoothly
- Step 4
Stage 4: Anticipation and Follow-Through
Convincing motion has a preparation before the action and residual motion afterward. Anticipation is a small backward move before the main action, such as the body crouching a little before a jump or a hand pulling back before a throw. Without anticipation, an action feels sudden and flat. Follow-through and overlapping action are the body parts that keep moving after the main action stops, such as hair, a scarf, or a hand that catches up a split second later. Practice by drawing a simple character swinging a punch, complete with a preparatory crouch and an arm that carries the swing past where the punch lands. This principle turns stiff motion into motion that carries weight and momentum.
Tips- Give flexible parts like hair or cloth a slight delay so they trail the body a beat behind its main motion
- The bigger the action, the more obvious the anticipation needs to be so the eye can catch its direction
Excessive anticipation on a small move makes animation look overacted. Match the size of the preparation to the size of the action. - Step 5
Stage 5: Pose to Pose and Straight Ahead
There are two ways to draw a sequence, and a beginner should master both. Pose to pose means drawing the key poses (keyframes) first, such as start, middle, and end positions, then filling the in-between drawings between them. This keeps the motion structure under control and suits planned actions. Straight ahead means drawing frames one after another from beginning to end, producing spontaneous motion that suits fire, water, or smoke. Practice pose to pose with a character leaping over a box: draw the crouch pose, the airborne pose, and the landing pose as keyframes, then fill in the in-betweens. Onion skin helps a lot here because you can see neighboring frames as you draw.
Tips- Number your keyframes before filling in-betweens so you never lose the sense of the motion
- For smoke or splashing water, try straight ahead so the motion feels looser and less rigid
- Step 6
Stage 6: The Walk Cycle and Building a Showreel
The walk cycle, a single stride that loops seamlessly, is the test that ties every earlier principle together. One ordinary walk cycle usually needs eight to twelve drawings and contains the contact pose, the down pose, the passing pose, and the up pose. Inside it live timing (the rhythm of the steps), arcs (the swing of the hips and arms), follow-through (the trailing back leg), and slow in slow out (the weight shifting). Finish a simple walk cycle with a stick figure before adding detail. Once you have several drills (the bouncing ball, the pendulum, the punching character, the leap, and the walk cycle), string them into a short showreel of about thirty seconds. That showreel is the proof of your motion skill that you can show a mentor, a school, or a prospective client.
Tips- Make your walk cycle loop seamlessly by ensuring the last frame connects to the first
- Build the showreel from your best work only, and put your strongest drill in the opening seconds
Do not chase the walk cycle in week one. Without the timing foundation from the bouncing ball, the footsteps will look like they float.
The Motion Principles Beginners Use Most
Timing and Spacing
FoundationThe number of frames sets speed, and the distance between drawings sets acceleration. These two carry almost every early drill.
Squash and Stretch
WeightAn object flattens and elongates slightly as it moves to convey weight and elasticity, with its volume kept constant.
Arcs
NaturalnessMotion follows a curved path, like a swinging arm or a turning head, so it reads as natural and fluid.
Anticipation
PreparationA small preparatory move before the main action, such as crouching before a jump, so the eye can read the direction.
Follow-Through
MomentumFlexible parts like hair or cloth that keep moving briefly after the body stops, giving a sense of momentum.
Slow In Slow Out
AccelerationDrawings bunch up at the start and end of a move, so the action starts slowly, speeds up, then slows before stopping.
On Ones or On Twos: How Many Drawings per Second
| Aspect | On Ones | On Twos |
|---|---|---|
| Drawings per second | 24 drawings | 12 drawings |
| Motion smoothness | Very smooth | Smooth and efficient |
| Workload | Highest | About half |
| Best for | Fast motion, camera moves | Most character action |
Much 2D animation is drawn on twos (one drawing held for two frames) to save effort without losing smoothness. Beginners should practice on twos first, then move to on ones for fast motion.
“Convincing motion is born from correct timing and spacing, long before the lines are made clean. That is what separates a drawing that merely moves from a drawing that feels alive.”
A Weekly Practice Routine for Beginners
- One bouncing ball drill with different weights (a rubber ball and a heavy ball)
- One arc-based motion drill, such as a pendulum or a waving arm
- One anticipation and follow-through drill on a simple character
- One pose-to-pose repetition with onion skin turned on
- Replaying and fixing at least one frame that feels off
- Saving each result to a showreel folder so progress is recorded
Learning Self-Taught or with a Mentor
- Free scheduling, and free software keeps the starting cost near zero
- Many basic drills can be found and repeated on your own
- Progress feels real when your first bouncing ball finally reads naturally
- It is hard to tell which frame makes the motion feel wrong without a trained eye to point it out
- Wrong timing habits can take root because nothing corrects them early
- Motivation fades easily when practice feels stuck with no feedback
When a Mentor Speeds Up Your Progress
Learning 2D animation can start on your own, and many beginners get far with self-guided practice. The point that stalls people most often is when motion feels wrong but they cannot tell which frame needs fixing. This is where a mentor speeds up progress, because a trained eye can show that the spacing at the top of a jump is too wide or that the hair follow-through is one frame short. At EduPoint, animation mentoring runs privately with one teacher per student, so practice matches your pace and goals. A mentor reviews your practice showreel frame by frame, gives concrete direction, and lays out your next set of drills. Sessions can be arranged from home or online, and payment accepts bank transfer, Virtual Account, QRIS, e-wallets, cards, and even Alfamart and Indomaret.
- Principles of motion are trained first, and software is only the tool to realize them
- The bouncing ball is the first drill that teaches timing, spacing, and squash and stretch at once
- The twelve animation principles of Thomas and Johnston are the map, with timing, spacing, and arcs as the beginner's foundation
- Free software Pencil2D, Krita, and OpenToonz is enough to learn from the bouncing ball to a walk cycle
- A walk cycle and a short showreel are real proof of motion skill to show a mentor or a client